
Heat Press for Iron On Patches: Settings, Steps and Fixes
How to use a heat press for iron on patches: temperature, time, pressure, and fixes for patches that peel. Maker-sourced steps for fabric and caps.
A heat press applies iron on patches more evenly than a household iron: it holds a set temperature, presses the whole patch at once, and on many models heats from below as well as above. This guide gives the heat press settings that patch makers publish, the steps to press a patch, and the fixes when a patch peels. Every figure is credited to the maker that published it; DTF Database has not run its own patch tests.
What heat press settings work for iron on patches?
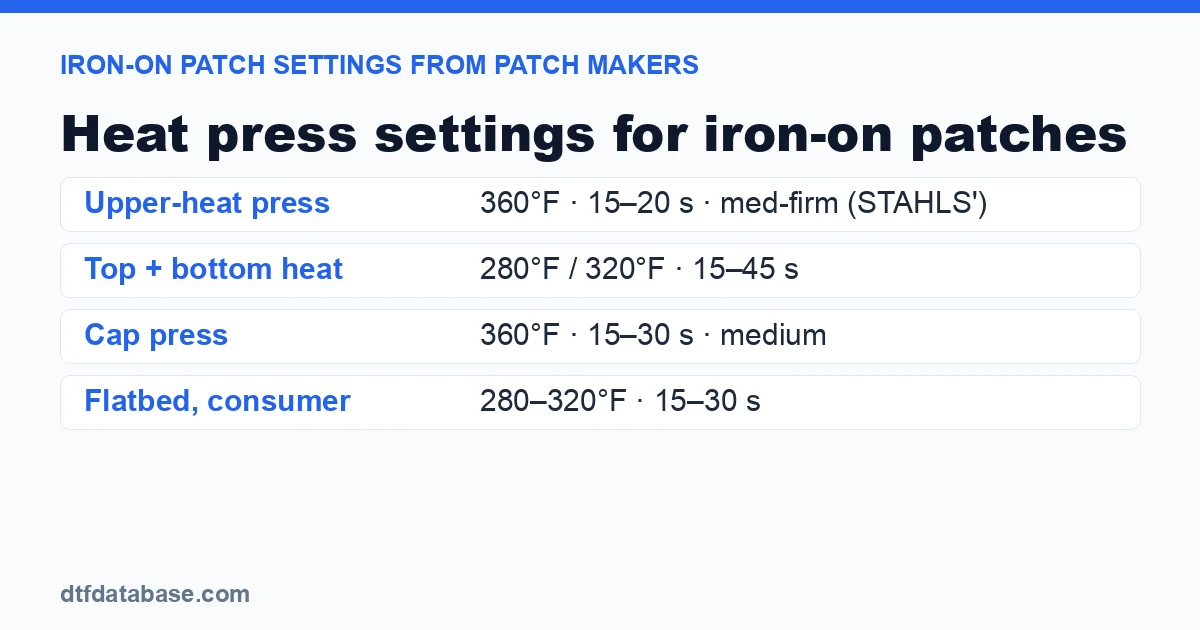
Most heat-seal iron on patches press at 280°F to 360°F for 15 to 45 seconds under medium to firm pressure, depending on the press. STAHLS' woven patch sheet gives 360°F for 15 to 20 seconds on an upper-heat press, while consumer patch makers list 280°F to 320°F. Let the patch cool fully before handling.
The range is wide because the settings depend on the press. STAHLS' and Transfer Express's spec sheets assume a professional press with a heated lower platen, which lets the adhesive melt from below at a lower top temperature. Consumer patch makers write for a single-heat flatbed press or a household iron.
Heat press settings by patch type and press
| Patch and press | Temperature | Time | Pressure | Source |
|---|---|---|---|---|
| Woven patch, upper-heat press | 360°F | 15–20 sec | Medium–firm | STAHLS' Woven Patches spec sheet (Oct 2025) |
| Woven patch, upper + lower heat | 280°F top / 320°F bottom | 15–20 sec | Medium–firm | STAHLS' Woven Patches spec sheet |
| Embroidered patch, upper-heat press | 360°F | 21 sec | Medium–firm | Transfer Express Embroidered Patches spec sheet (rev. 04/26) |
| Embroidered patch, upper + lower heat | 280°F top / 320°F bottom | 30–45 sec | Medium–firm | Transfer Express Embroidered Patches spec sheet |
| 3D embroidered patch, lower-heat press | 250°F top / 320°F bottom | 20 sec | Medium | STAHLS' 3D Embroidered Patches spec sheet (Oct 2025) |
| PVC patch, upper-heat press | 375°F | 25 sec | Medium | STAHLS' PVC Patches spec sheet |
| Embroidered-edge patch, flatbed press | 300°F | 15 sec | Medium | YouCustomizeIt iron-on patch instructions |
| Heat-seal patch, flatbed press | 270–320°F | 15–30 sec | Medium–firm | Dutch Label Shop heat press guide |
STAHLS' sheets add a pre-heat: warm the lower platen for 60 seconds and the garment for 20 seconds before the patch goes on, and use a 1/8-inch foam pad or a silicone pad under the garment. Transfer Express and STAHLS' both say top and bottom heat gives the best result, and STAHLS' says 3D patches "require bottom heat." All of these settings were written for the makers' own presses (Hotronix, in STAHLS' case); start at the low end of the time range on a different press and check the bond.
Settings by fabric
| Fabric | Can you heat press a patch? | Notes and source |
|---|---|---|
| 100% cotton | Yes | Listed as compatible on STAHLS' woven, embroidered and PVC sheets |
| Cotton/poly blend | Yes | Listed as compatible by STAHLS'; Dutch Label Shop suggests testing a hidden area and lowering the heat slightly |
| 100% polyester | Yes, cooler | Listed as compatible by STAHLS'; Dutch Label Shop puts polyester at the low end of 270–320°F for 10–15 seconds |
| Nylon, silk, leather, wool, fleece | Not recommended | STAHLS' and Transfer Express list "some nylons, silk, leather, wool, fleece" as heat-sensitive; The Cheap Place says to sew patches onto leather and nylon instead |
| Caps and hats | Yes, with a cap or hat press | See the caps section below |
No patch maker we found publishes heat press settings for leather or canvas, so this page doesn't give any.
How to heat press an iron on patch
- Preheat the press to the patch maker's temperature. On a press with a heated lower platen, warm the lower platen for 60 seconds (STAHLS').
- Pre-press the garment for about 20 seconds to remove moisture and wrinkles from the patch area (STAHLS' pre-heats the fabric for 20 seconds).
- Position the patch adhesive side down. Measure placement with the placement calculator if it goes on a chest or sleeve.
- Cover it. Consumer patch makers use parchment or a Teflon sheet over the patch; STAHLS' puts a foam or silicone pad under the garment instead.
- Press at the settings in the table, with medium to firm pressure.
- Let it cool completely before you lift or flex the patch. STAHLS' says to remove thermo-tape on PVC patches only after the emblem "cools completely," and Dutch Label Shop says to cool fully before handling.
- Press from the inside (optional). The Cheap Place recommends turning the garment inside out and pressing the back of the patch area again. STAHLS' sheets don't include this step.
- Wait 24 hours before washing. Dutch Label Shop and The Cheap Place both give at least 24 hours; STAHLS' says to wash cold, inside out, and hang dry.
Heat press vs household iron for patches
| Heat press | Household iron | |
|---|---|---|
| Temperature | Set to a number; held across the platen | A dial setting; The Cheap Place says to aim for 280°F (±10°F), no steam |
| Pressure | Even across the whole patch | Depends on how hard you lean; YouCustomizeIt says to move in small circles with firm pressure |
| Time | Timed automatically | Counted by hand: 20 to 30 seconds in the patch makers' instructions |
| Heat from below | Available on dual-heat and hat presses | No |
| Caps and curved items | Cap and hat presses are made for them | Hard to press evenly |
For one patch on a jacket, an iron works if you follow the patch maker's instructions. For a run of shirts, uniforms or hats, a heat press repeats the same settings on every piece. Our heat press buying guide compares press types, including hat presses.
Why do patches peel off?
| Cause | Fix |
|---|---|
| Temperature too low (The Cheap Place calls incorrect temperature "the #1 reason" patches don't stick) | Raise to the maker's temperature and check it with a temperature gun or strips |
| Too little or uneven pressure (Dutch Label Shop) | Increase pressure; use a foam pad so pressure reaches around seams |
| Moved before it cooled (Dutch Label Shop) | Let the adhesive set completely before handling |
| Washed too soon | Wait at least 24 hours, then wash cold and inside out |
| Heat-sensitive fabric | Sew the patch on, or use a pressure-sensitive backing on hard surfaces |
| Too much heat | The Cheap Place warns excess heat can melt the backing; stay inside the maker's range |
If an edge lifts after cooling, The Cheap Place says to press that edge again for 10 to 15 seconds. For patches that must last, sewing the edge after pressing adds the most hold.
Patches on caps and curved items
STAHLS' gives separate cap settings. On a hat press with top and bottom heat: 280°F top and 320°F bottom, medium pressure, 15 to 20 seconds for woven patches and 30 to 45 seconds for embroidered (Transfer Express). On a cap press with a heated lower form: 360°F, medium pressure, 15 to 20 seconds for woven patches and 20 to 30 seconds for embroidered, after pre-heating the lower platen for 60 seconds and the loaded cap for 20 seconds. A flat press can't reach the curve of a structured cap evenly, which is why the makers specify a hat or cap press.
Using the same heat press for DTF transfers and patches
A shop that presses DTF transfers already owns the press it needs for patches, but the settings differ. Cotton DTF transfers press at 300 to 325°F for 10 to 15 seconds (our DTF temperature and time chart), while patches need longer dwell times and, ideally, bottom heat. Darrin's six years on a Hotronix Fusion IQ are the basis of our press reviews; for transfers to pair with patches, browse the DTF supplier directory or compare DTF printers if you print your own.
Sources
Settings come from STAHLS' Woven Patches, 3D Embroidered Patches and PVC Patches spec sheets (October 2025), the Transfer Express Embroidered Patches spec sheet (revised April 2026), YouCustomizeIt's iron-on patch instructions, Dutch Label Shop's heat press guide and The Cheap Place's iron-on instructions, all read November 11, 2026. Always follow the instructions that come with your patches when they differ.
Written by Darrin DeTorres, DTF Database founder. AI helped research and draft this page; every figure was checked against the named sources before publishing.Tags
About the Author
DTF Database Founder
Darrin DeTorres has over 10 years of experience in the print industry, specializing in screen printing, sublimation, embroidery, HTV, and DTF printing. He runs Notice Me Marketing and Media, a custom apparel production company that prints thousands of shirts per month.
More from Tutorials
Explore DTF Database
Browse and compare 20+ verified DTF printer models by price, features, and specifications.
Read moreCalculate your per-print costs, profit margins, and ROI for DTF printing.
Read moreBrowse verified DTF suppliers for ink, film, powder, and equipment.
Read moreFind DTF transfer suppliers shipping to your state, with verified turnaround times.
Read moreMetro-level DTF supplier guides for Los Angeles, NYC, Dallas, Houston, and more.
Read moreStep-by-step guide to the DTF printing process with temperatures and troubleshooting.
Read more