
Roland Test Print Problems: Causes and Fixes
Roland test print showing missing lines, banding or streaks? Step-by-step fixes for clogged nozzles, ink, head height and more, with a symptom table.
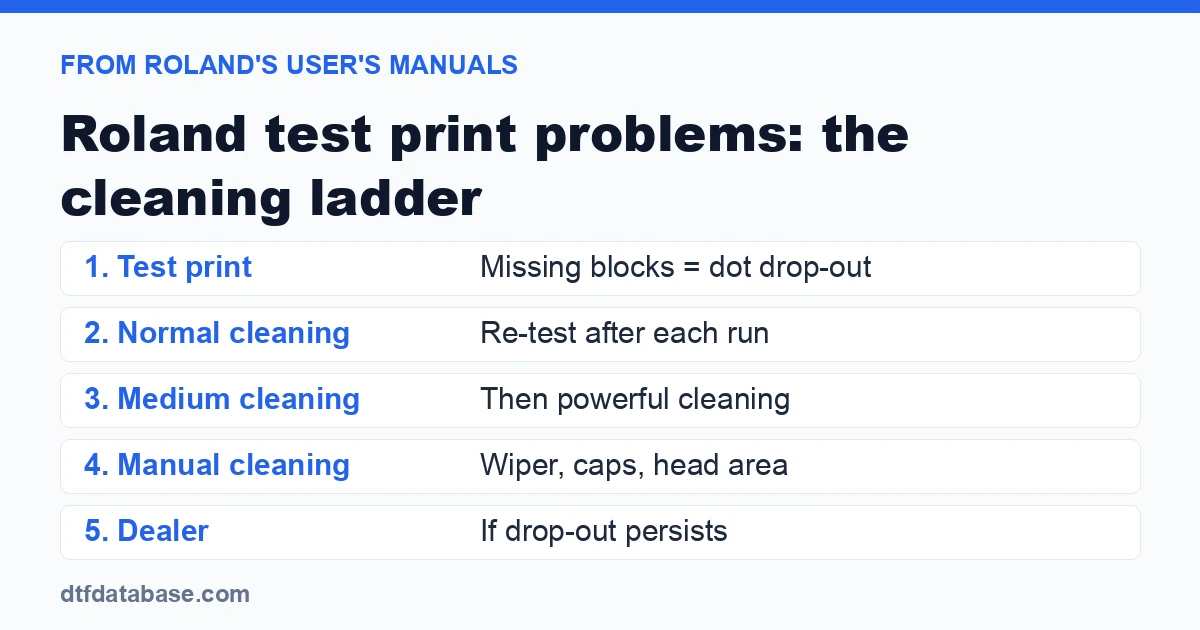
A Roland test print (Roland's manuals call it the printing test or nozzle drop-out test) shows whether every nozzle in the print heads is firing. When it comes out with gaps, crooked blocks or faint bands, the fix is usually a cleaning cycle, run in the order Roland's own manuals give. This guide collects those steps for three Roland machines whose manuals we read: the VersaCAMM SP-300 eco-solvent printer and the VersaSTUDIO BY-20 and TY-300 DTF printers. DTF Database has not run these printers; every cause and fix below comes from Roland's user's manuals, cited by model.
What causes a Roland test print to fail?
A failed Roland test print is usually caused by clogged or blocked nozzles, which show up as missing blocks or banding. Other causes are air in the ink lines, a dirty wiper or cap, poorly loaded media and ink hardening after idle time. Run a normal cleaning first, reprint the test, and escalate only if gaps remain.
Roland's BY-20 and TY-300 manuals describe the two failures to look for in the test pattern: "Missing blocks indicate dot drop-out. Collapsed or inclined blocks indicate dot displacement." Not every gap stops a job. The TY-300 manual treats dot drop-out in up to 10 locations in one nozzle row as within standard, as long as the gaps are scattered, and the BY-20 manual says a printer with only a few drop-outs can be used without further cleaning if the print isn't affected.
Roland test print symptoms, causes and first fixes
| Symptom | Likely cause (per Roland's manuals) | First fix |
|---|---|---|
| Missing segments in a color bar | Dot drop-out from clogged nozzles | Normal cleaning, then reprint the test |
| Collapsed or slanted blocks | Dot displacement (BY-20, TY-300) | Clean, then reprint; the TY-300 manual says displacement has only a slight effect |
| Horizontal banding or stripes in prints | Nozzle drop-out, feed correction not done after changing media, media gap not adjusted, room below 20°C (68°F), heater too low, printer not level or in moving air (BY-20 troubleshooting) | Test print first; if the pattern is clean, run feed correction and check the room and media |
| Gaps that return after cartridge changes | Air in the ink tube; the SP-300 manual warns that frequent cartridge insertion and removal "may cause air to enter the ink tube" | Leave cartridges seated; clean, then test |
| Gaps after the printer sat unused | Ink hardening in the heads (BY-20) | Start-up cleaning, then the cleaning ladder |
| Faint or patchy white on a DTF printer | White ink settling; uneven density not fixed by shaking cartridges (TY-300) | Ink circulation (Maintenance > Ink Circulation), then powerful cleaning |
| Drop-out that survives every cleaning level | Dirt on the head area, wiper or caps, or a worn head | Manual cleaning, then contact a Roland dealer |
How to fix a failed Roland test print
Work down this list in order and print the test again after every step. Roland's manuals warn against cleaning more than needed: the BY-20 manual says the heads "are prone to damage if cleaned too frequently," and the SP-300 manual says powerful cleaning "can cause premature head wear."
- Check the ink. Make sure cartridges or pouches are seated and not empty, and on DTF printers mix the white ink as the daily routine requires (TY-300). Don't pull and reseat cartridges repeatedly; that can let air into the ink tube (SP-300).
- Run the test print.
- Run a normal cleaning and test again.
- Step up to medium cleaning.
- Run a powerful cleaning.
- Use the deeper cleaning modes on DTF models. For severe drop-out (several locations in a row), the BY-20 and TY-300 manuals add Light Choke Cleaning (BY-20: Maintenance > Ink > Light Choke Cleaning). The TY-300 manual also lists Ink Renewal.
- Clean by hand. If cleaning cycles don't clear it, clean the area around the heads with the cleaning kit.
- Check the setup. Confirm the media is loaded correctly, the printer is level and out of drafts, and, on the BY-20, that feed correction and the media gap were set after the last media change. The three manuals we read don't include a head-height step in their test-print troubleshooting; if your model has a head-height lever, set it for your media as its manual describes.
- Keep to the maintenance schedule. The BY-20 manual says a printer left unused for 24 hours or more after shut-down cleaning needs start-up cleaning before the next shut-down cleaning. For breaks longer than a week, it says to switch on the sub power once a week and run start-up and shut-down cleaning. The SP-300 shows a [REPLACE WIPER] message after about 1,500 cleanings; the BY-20 manual notes that replacing the wiper also helps with persistent drop-out.
Our DTF printer maintenance and troubleshooting guides cover daily DTF care across brands.
When to stop and call service
The SP-300 manual says to contact an authorized Roland DG dealer or service center if dot drop-out persists after the cleaning-kit procedure, or when the kit is used up. Signs that cleaning won't solve it:
- The same nozzles stay missing after the full ladder: normal, medium, powerful and manual cleaning.
- Drop-out spreads or gets worse after cleaning instead of better.
- Ink drips, smears or "dragging dirt" continue after a wiper change.
Roland's manuals don't give a fixed number of cleaning cycles before calling service; they say "several times" for each level, and the BY-20 manual gives "two or three times" for medium cleaning. Print heads are consumable parts that a Roland dealer replaces. Each powerful cleaning also uses a lot of ink, so repeated cycles on a head that isn't improving cost money without fixing it.
Which Roland models this guide covers
| Model | Type | Manual used |
|---|---|---|
| VersaCAMM SP-300 | Eco-solvent printer/cutter | SP-300 User's Manual, revision R4 |
| VersaSTUDIO BY-20 | Desktop DTF printer | BY-20 online User's Manual |
| TY-300 series | DTF printer with white ink | TY-300 online User's Manual |
We didn't find a published troubleshooting section for the newer VersaSTUDIO BY2-20 or for the VersaSTUDIO BN-20, so this page gives no model-specific steps for them; check the manual that shipped with the printer. Our listings for the Roland VersaStudio BY2-20 and Roland TY-300i have specs and pricing, and the DTF printer comparison lists other machines.
Sources
All steps, menu names, quotes and thresholds come from Roland DG's own documentation on downloadcenter.rolanddg.com: the SP-300 User's Manual (R4, PDF) and the online user's manuals for the BY-20 and TY-300, read November 11, 2026. Menu names can differ between firmware versions; when your screen doesn't match, follow the manual that came with your printer.
Written by Darrin DeTorres, DTF Database founder. AI helped research and draft this page; every figure was checked against the named sources before publishing.Tags
About the Author
DTF Database Founder
Darrin DeTorres has over 10 years of experience in the print industry, specializing in screen printing, sublimation, embroidery, HTV, and DTF printing. He runs Notice Me Marketing and Media, a custom apparel production company that prints thousands of shirts per month.
More from Troubleshooting
Explore DTF Database
Browse and compare 20+ verified DTF printer models by price, features, and specifications.
Read moreCalculate your per-print costs, profit margins, and ROI for DTF printing.
Read moreBrowse verified DTF suppliers for ink, film, powder, and equipment.
Read moreFind DTF transfer suppliers shipping to your state, with verified turnaround times.
Read moreMetro-level DTF supplier guides for Los Angeles, NYC, Dallas, Houston, and more.
Read moreStep-by-step guide to the DTF printing process with temperatures and troubleshooting.
Read more