
DTF Transfer Size Chart: What Size Should a Shirt Design Be? T-Shirt Design Dimensions, Placement and Ruler Template
DTF transfer size chart by shirt size: adult designs 11-12 in wide, 2XL and up 13-14, youth 8-10, toddler 6-7, left chest 3.5-4. With placement and a ruler.
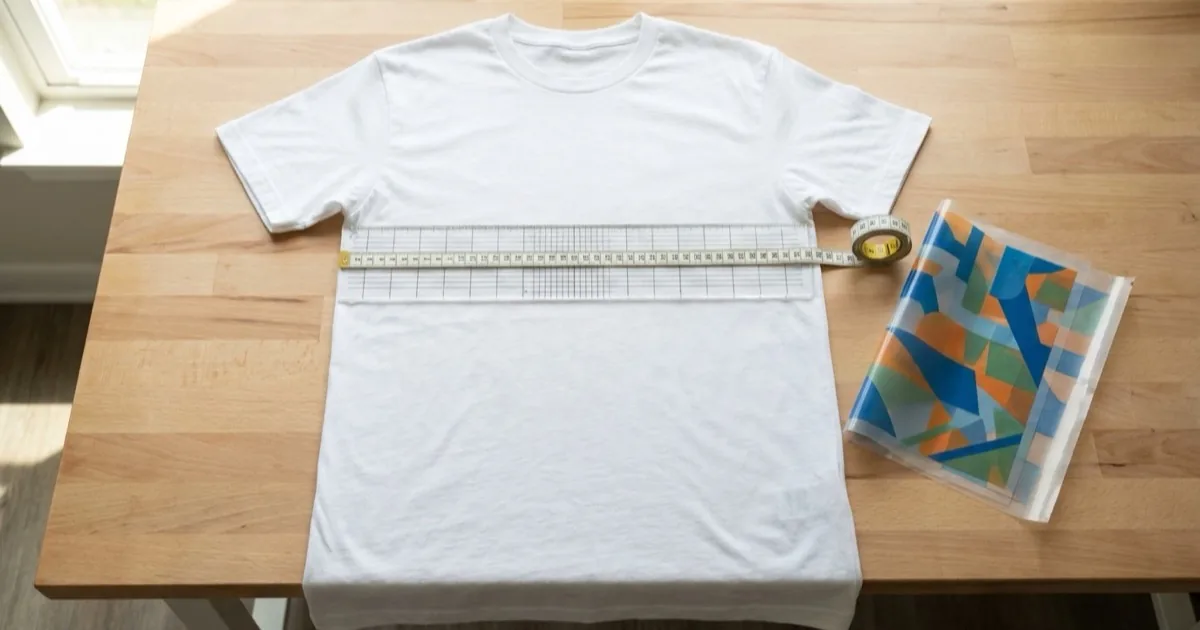
What size should a shirt design be?
A shirt design should be about 11 to 12 inches wide for an adult full front, 13 to 14 inches on 2XL and up, 8 to 10 inches on youth shirts, and 6 to 7 inches on toddler sizes. A left chest logo is 3.5 to 4 inches wide. Start adult front designs 3 to 4 inches below the collar.
Those widths are the same whether you press DTF transfers, HTV, or screen print transfers. Most shops order one adult file for S through XL, a second file for 2XL and up if the order justifies it, and a separate youth file whenever youth sizes are in the run.
DTF transfer size chart by shirt size
Chest widths are laid-flat ranges across mainstream US blanks (Gildan, Bella+Canvas, Next Level, Hanes, Comfort Colors); check the manufacturer's chart for the specific blank. The design width is for a standard centered front print, measured at its widest point, with the top of the design set the stated distance below the collar seam. The same figures drive the DTF placement calculator, which draws any transfer size on any shirt size.
| Shirt size | Chest width (laid flat) | Front design width | Top of design below collar seam |
|---|---|---|---|
| Toddler 2T | Not published | 6–7" | 2–3" |
| Youth XS (4) | 13–14" | 8–10" | 2–3" |
| Youth S (6–8) | 14–15.5" | 8–10" | 2–3" |
| Youth M (10–12) | 16–17" | 8–10" | 2–3" |
| Youth L (14–16) | 17–18.5" | 8–10" | 2–3" |
| Youth XL (18–20) | 18.5–20" | 8–10" | 2–3" |
| Adult S | 18–18.5" | 11–12" | 3–4" |
| Adult M | 20–20.5" | 11–12" | 3–4" |
| Adult L | 22–22.5" | 11–12" | 3–4" |
| Adult XL | 24–24.5" | 11–12" | 3–4" |
| Adult 2XL | 26–26.5" | 13–14" | 3–4" |
| Adult 3XL | 28–28.5" | 13–14" | 3–4" |
Other placements, by size tier:
| Placement | Youth | Adult (S–XL) | Adult 2XL+ | Measured from |
|---|---|---|---|---|
| Left chest logo | 2.5–3.5" wide, 4–6" down | 3.5–4" wide, 7–9" down | 3.5–4" wide, 7–9" down | Left shoulder seam |
| Full back | 9–11" wide, 2–3" down | 12–14" wide, 3–4" down | 13–14" wide, 3–4" down | Collar seam |
| Sleeve | 1.5–2.5" wide, 1–1.5" up | 2–3" wide, 1–1.5" up | 2–3" wide, 1–1.5" up | Sleeve hem |
| Neck label (nape) | Not published | 2–3" wide, 0.5–1" down | 2–3" wide, 0.5–1" down | Collar seam |
| Hoodie front (above pocket) | Not published | 10–12" wide, 3–4" down | 10–12" wide, 3–4" down | Collar seam |
| Hoodie back | Not published | 12–14" wide, 4–5" down | 12–14" wide, 4–5" down | Back hood seam |
Hoodie figures come from the hoodie placement section of the placement guide; sweatpants, hats, polos, and tote bags are in the design size chart for hoodies, sweatpants, hats and sleeves.
T-shirt design dimensions in pixels (300 DPI)
T-shirt design dimensions are set in inches first, then converted to pixels at 300 DPI, the resolution most DTF transfer suppliers ask for. Multiply each inch by 300: a 12 inch wide adult front design is 3,600 pixels wide, and a 4 inch left chest logo is 1,200 pixels. Build the file at the final print size with a transparent background and export a PNG; a small file stretched up later prints soft or pixelated.| Placement | Design width (in) | Width at 300 DPI (px) | Example canvas (px) |
|---|---|---|---|
| Adult full front | 11–12 | 3,300–3,600 | 12 × 14 in = 3,600 × 4,200 |
| Adult 2XL+ full front | 13–14 | 3,900–4,200 | 14 × 16 in = 4,200 × 4,800 |
| Youth full front | 8–10 | 2,400–3,000 | 10 × 10 in = 3,000 × 3,000 |
| Toddler full front | 6–7 | 1,800–2,100 | 7 × 7 in = 2,100 × 2,100 |
| Left chest logo | 3.5–4 | 1,050–1,200 | 4 × 4 in = 1,200 × 1,200 |
| Full back | 12–14 | 3,600–4,200 | 12 × 16 in = 3,600 × 4,800 |
| Sleeve | 2–3 | 600–900 | 3 × 3 in = 900 × 900 |
The canvas height depends on the artwork; the examples show common proportions, not fixed rules. A file's DPI setting alone does not change its size: 1,000 × 1,000 pixels prints at about 3.3 inches square at 300 DPI. Check your supplier's artwork page for its minimum resolution, and see the Canva shirt design guide for setting a canvas in inches.
Where Do You Place Designs on a T-Shirt?
Full Front Chest (Center)
The most common placement for DTF and HTV transfers.| Size Category | Distance from Collar | Design Width | Design Height |
|---|---|---|---|
| Adult S–XL | 3–4" below collar seam | 11–12" | 10–14" |
| Adult 2XL+ | 3–4" below collar | 13–14" | 11–15" |
| Youth S–XL | 2–3" below collar | 8–10" | 7–10" |
| Toddler 2T–5T | 2–3" below collar | 6–7" | 5–7" |
| Infant 6M–24M | 1.5–2" below collar | 4–5.5" | 4–5.5" |
Left Chest (Logo Placement)
Standard placement for small logos, brand marks, and pocket-area designs.- Position: 7–9" down from the left shoulder seam and 4–5" from the center fold of the shirt
- Adult design size: 3.5" x 3.5" to 4" x 4"
- Youth design size: 2.5" to 3.5" wide, 4–6" down from the left shoulder seam
Full Back
Large back prints are positioned below the collar and centered horizontally.| Size Category | Distance from Collar | Design Width |
|---|---|---|
| Adult | 3–4" below collar | 12–14" |
| Youth | 2–3" below collar | 9–11" |
Sleeve
- Position: Centered on the sleeve, 1–1.5" up from the sleeve hem
- Standard size: 2–3" wide on adult sleeves, 1.5–2.5" on youth; below about 1.5" the detail is lost, and wider prints wrap the seam
- Placement tip: Use a heat press pillow inside the sleeve for even pressure. For temperature, time, and pressure once placement is set, see the DTF heat press settings guide.
What Size Should Neck Labels Be?
Replacing manufacturer tags with custom printed neck labels is a popular branding method. Standard neck label dimensions:
| Label Type | Width | Height |
|---|---|---|
| Standard neck label | 2.5–3" | 1–1.5" |
| Extended brand label | 3–4" | 1.5–2" |
| Youth neck label | 2–2.5" | 0.75–1" |
What DTF Transfer Size Fits Hoodies, Sweatshirts, Tanks and Totes?
T-shirt sizes are in the chart at the top of this page. For every other garment, including sweatpants, hats, polos, and sleeves, see the design size chart for hoodies, sweatpants, hats and sleeves.
| Garment | Recommended Max Transfer Width | Notes |
|---|---|---|
| Hoodie (Front) | 10–12" | Account for center pocket if present |
| Hoodie (Back) | 12–14" | Larger canvas available |
| Crew Neck Sweatshirt | 10–12" | Thicker fabric may need higher pressure |
| Tank Top | 8–10" | Narrower chest panel |
| Tote Bag | 8–10" | Depends on bag dimensions |
How to Use a Shirt Placement Ruler
A shirt placement ruler (also called a tshirt ruler template, alignment guide, or placement tool) is a T-shaped or cross-shaped ruler that centers your design on the garment.
DIY T-Shirt Ruler Guide
You can make your own placement ruler from cardboard or foam board:
- Cut a strip 24" long by 2" wide (the vertical guide)
- Cut a second strip 18" wide by 2" tall (the horizontal crossbar)
- Attach them in a T-shape — the vertical strip extends downward from the center of the crossbar
- Mark measurements in inches along the vertical strip starting from the intersection (0" at the crossbar, 1", 2", 3", etc.)
- To use: hook the crossbar over the collar of the shirt. The vertical strip hangs down the center. Measure down to your desired placement and center the transfer
Printable T-Shirt Ruler Template
Commercial printable tshirt ruler templates are available from craft supply stores and can be printed on heavy cardstock. Look for ones that include markings for adult, youth, and toddler sizes on a single tool.How Do You Design Custom Neck Labels?
Custom neck labels (also called screen printed neck labels or tag prints) replace the manufacturer's tag with your own branding. Here is how to design and produce them:
Shirt Tag Template
A shirt tag template is a design file sized to standard neck label dimensions (2.5–3" wide by 1–1.5" tall). Your template should include:- Brand name or logo — Centered, prominent
- Size indicator — S, M, L, XL, etc.
- Care instructions — Wash/dry symbols or brief text
- Country of origin — Required for retail products in the US
- Fiber content — Required by the FTC Textile Fiber Products Identification Act
How to Create a Neck Label
- Design your label at 300 DPI in the standard dimensions (2.5" x 1" is the most common)
- Export as PNG with a transparent background for DTF, or as a vector file for screen printing
- For DTF neck labels: press at standard settings using a small heat press pillow inside the collar
- For screen printed neck labels: a screen printer applies the tag directly to the inside back of the garment using plastisol ink — this is the most durable and lowest-profile method
For sourcing options, MOQs, and finished-label pricing, see the custom heat transfer neck labels guide.
Inside Shirt Tag Template
An inside shirt tag template (shirt tag template PNG) typically includes your logo, size, care symbols, and legal text arranged in a compact layout. Free tag templates are available from design resources — customize with your brand information before printing.How Far Down from the Collar Should a Design Be?
For adult t-shirts, the top of the design should be 3–4 inches below the collar seam. For youth and toddler sizes, 2–3 inches is the standard.
| Size Category | Distance from Collar |
|---|---|
| Adult S–XL | 3–4 inches |
| Adult 2XL+ | 3–4 inches |
| Youth S–XL | 2–3 inches |
| Toddler 2T–5T | 2–3 inches |
| Infant 6M–24M | 1.5–2 inches |
These measurements create a visually centered chest placement. Measure from the bottom of the collar seam (not the neckline) down to the top edge of your design. For V-neck shirts, measure from the center point of the V.
Heat Transfer Vinyl Placement Guide
HTV (heat transfer vinyl) follows the same placement rules as DTF transfers. The measurements for distance from the collar, design width, and left chest position are identical regardless of whether you are using HTV or DTF. The differences between the two methods are in the application process, not the placement:
- Weeding: HTV requires weeding excess vinyl from around the design before pressing. DTF transfers come ready-to-press with no weeding required.
- Temperature: HTV typically uses slightly lower temperatures than DTF. Most HTV presses at 305–315°F, while DTF transfers press at 300–325°F depending on the powder and film. The full fabric-by-fabric breakdown is in the heat press temperature chart for DTF.
- Press time: HTV pressing times are typically 10–15 seconds, which is comparable to DTF but may vary by vinyl brand and type. For HTV brand and finish picks, see the heat transfer vinyl buying guide.
If you already have placement measurements dialed in for DTF transfers, use the exact same positions for HTV projects. A shirt placement ruler works the same way for both methods.
T-Shirt Ruler Tips for Consistent Placement
Getting accurate results from a tee shirt ruler comes down to technique and consistency. Follow these practical tips for reliable placement on every garment:
- Hook the crossbar snugly over the collar seam, not the neckline. The collar seam is the stitched edge where the collar band meets the body of the shirt. Hooking at the neckline will throw off your measurements.
- For crew necks, align at the center back of the collar band. This gives you a consistent reference point across different shirt brands and collar styles.
- For V-necks, align at the center point of the V. The lowest point of the V serves as your starting measurement, not the shoulder seam.
- Press the ruler flat against the shirt before marking your position. Any slack or bunching in the shirt fabric will shift the placement when the shirt is laid flat on the heat press.
- Use heat-resistant tape to temporarily hold the transfer in place after removing the ruler. This prevents the transfer from shifting between marking and pressing. Standard masking tape can leave residue under heat — use tape rated for heat press temperatures.
- For production runs, set the ruler to the same measurement for every shirt in the batch to ensure consistency across all pieces. Lock in your measurement once and do not adjust between shirts unless the garment size changes.
Does HTV Follow the Same Placement Rules?
Whether you are pressing DTF transfers, HTV vinyl, sublimation, or screen print transfers, the placement measurements in this guide apply universally. The only difference is the application method — HTV requires weeding and typically uses slightly lower temperatures, while DTF transfers come ready-to-press.
Frequently Asked Questions
What size should a design be on a shirt?
For an adult shirt, a full front design is 11–12 inches wide (13–14 inches on 2XL and up) and a left chest logo is 3.5–4 inches wide. Youth shirts take an 8–10 inch front print and toddler shirts 6–7 inches. The DTF transfer size chart at the top of this page lists the width for each shirt size.How far down from the collar should a design be on a t-shirt?
For adult t-shirts, position the top of the design 3–4 inches below the collar seam. For youth and toddler sizes, position 2–3 inches below. These measurements create a visually centered appearance on the chest.What size should a neck label be in inches?
A standard printed neck label is 2.5–3 inches wide by 1–1.5 inches tall. Place it centered horizontally and 1 inch below the collar seam on the inside back of the garment.What is a shirt placement ruler?
A shirt placement ruler is a T-shaped alignment tool that hooks over the collar of a garment to help you consistently center transfers and designs. It can be purchased commercially or made from cardboard using the DIY method described above.What size DTF transfer do I need for a youth shirt?
Youth t-shirt transfers are typically 8–10 inches wide, with the top 2–3 inches below the collar seam. Left chest logos for youth are 2.5–3.5 inches wide, set 4–6 inches down from the left shoulder seam. Always measure the actual garment to confirm.Is a DTF transfer size chart the same as a design size chart?
Yes. The transfer is the design printed at its final size, so a DTF transfer size chart and a shirt design size chart list the same widths: 11–12 inches for an adult front, 8–10 for youth, 3.5–4 for a left chest. Order the transfer at the width you want on the shirt and the supplier scales the height to match.How do I center a design on a shirt without a ruler?
Fold the shirt in half vertically and make a light crease at the center. Measure down from the collar to your desired starting point. Use painter's tape to mark the position before pressing.Neckline shape changes where a transfer can start — a V-neck or scoop needs to be measured from the bottom of the neckline opening rather than the shoulder seam. See the t-shirt neck types guide for clearance by neck type.
If any of the terminology above is unfamiliar, direct-to-film printing explained covers the basics.
Tags
About the Author
DTF Database Founder
Darrin DeTorres has over 10 years of experience in the print industry, specializing in screen printing, sublimation, embroidery, HTV, and DTF printing. He runs Notice Me Marketing and Media, a custom apparel production company that prints thousands of shirts per month.
More from Tutorials
How to design t-shirts: pick the message, choose free or paid software, set a 300 DPI canvas at print size, place it right and export a transparent PNG.
Explore DTF Database
Browse and compare 20+ verified DTF printer models by price, features, and specifications.
Read moreCalculate your per-print costs, profit margins, and ROI for DTF printing.
Read moreBrowse verified DTF suppliers for ink, film, powder, and equipment.
Read moreFind DTF transfer suppliers shipping to your state, with verified turnaround times.
Read moreMetro-level DTF supplier guides for Los Angeles, NYC, Dallas, Houston, and more.
Read moreStep-by-step guide to the DTF printing process with temperatures and troubleshooting.
Read more