
How to Press DTF Over Seams, Zippers, Pockets & Collars
Seams, zippers, pockets and collars lift the platen off a DTF transfer. How to use press pillows, threadable platens and placement to press them evenly.
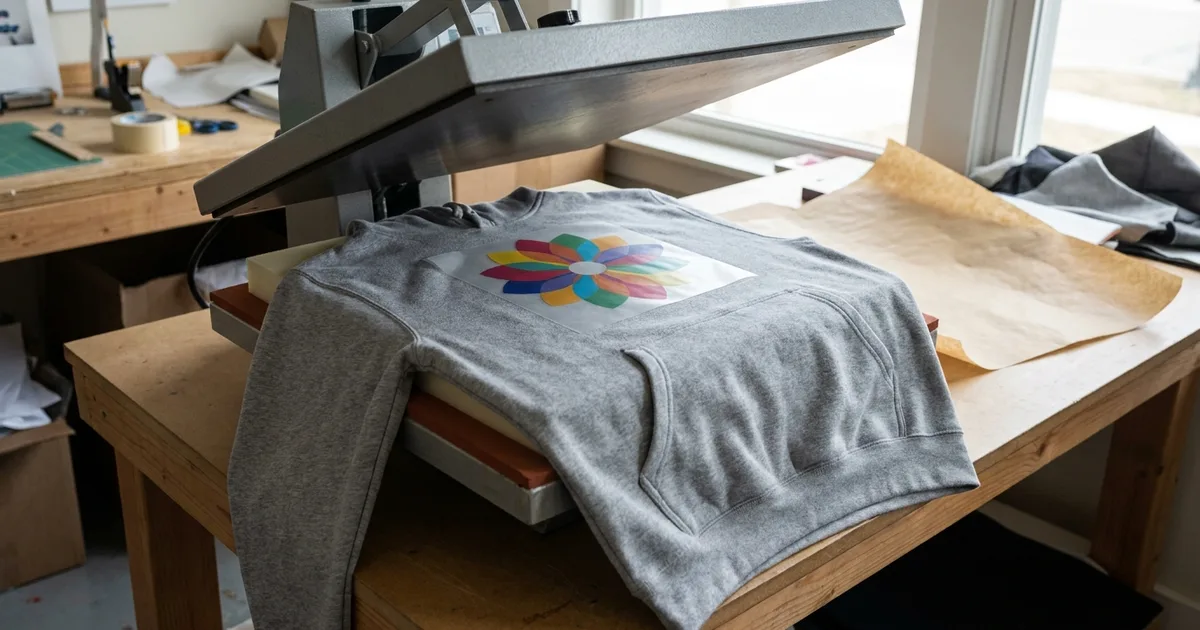
This guide covers why that happens, the tools that fix it, and a setup for each common obstacle: side and shoulder seams, hoodie pockets, full-zip hoodies, collars and plackets, chest pockets, and sleeves.
Why Seams and Zippers Cause DTF Failures
A heat press applies pressure through two flat surfaces. When something thicker than the fabric sits under the platen, the platen rests on that high spot first. The area right next to it gets heavy pressure, and the area a few inches away gets less, sometimes none at all.
DTF adhesive needs heat, time and pressure together to flow into the fibers. Where pressure is missing, the adhesive melts but never bonds. The usual results are:
- A faint outline of the seam printed into the middle of the design.
- Edges that lift right after the peel, or after the first wash.
- Patchy adhesion where one half of the design holds and the other peels off with the film.
If a transfer is already failing, the DTF transfer not sticking guide walks through the other causes (temperature, time and peel timing) so you can rule them out. For more pressing habits beyond obstacles, see the 21 DTF heat press tips.
Tools That Solve Uneven Pressure
You do not need special equipment for most garments. Three accessories cover nearly every case.
| Tool | What it does | Best for |
|---|---|---|
| Heat press pillow | A heat-resistant foam pad placed inside the garment to raise the print area above seams and hardware | Hoodie pockets, zippers, side seams, thick fleece |
| Sleeve pillow or narrow platen | A long, narrow pad or platen that fits inside a sleeve or pant leg | Sleeves, pant legs, narrow panels |
| Threadable or small lower platen | A smaller bottom platen the garment slides onto, so only the print area sits under the upper platen | Collars, pocket areas, necks, bags |
Pillows are sold in common sizes such as 10x12, 12x14 and 14x16 inches, plus 5x18 sleeve pillows. The pillow should be slightly larger than the design but smaller than the area between the obstacles, so the edge of the pillow does not land under the transfer. The heat press accessories guide covers pillows, cover sheets and replacement platens in more detail.
Threadable lower platens let a sleeve, neck or pant leg slide onto the platen like a sock, so seams hang out of the way. STAHLS' updated its Hotronix Threadable LowRider in September 2026 with a threadable lower platen and a four-platen kit.
How to Press DTF Near Side and Shoulder Seams
Side seams only matter on wide designs and on small garments such as youth tees, where the design may reach the seam.
- Check the design width against the garment. Use the placement guide to size the print so it stays inside the flat front panel.
- If the design must come close to a seam, slide a pillow inside the shirt so the pillow edge sits just inside the seam.
- Pre-press for 2 to 5 seconds to remove moisture and flatten the pillow into place.
- Press at the settings for your fabric from the DTF temperature and time chart.
For shoulder seams on back-neck or yoke prints, drop the design low enough that the shoulder seam sits outside the upper platen, or use a small lower platen.
How to Press DTF on a Hoodie With a Front Pocket
The kangaroo pocket on a pullover hoodie creates a thick top edge and double layers of fleece. Most front-chest hoodie prints sit above the pocket, but the pocket seam still lifts the lower edge of the platen.
- Place a pillow inside the hoodie so it fills the chest area and stops just above the pocket's top seam.
- Position the transfer so its bottom edge sits at least a finger's width above the pocket seam. The placement guide has hoodie measurements by size.
- Pull the hood and drawcords back over the top of the press, away from the platen.
- Pre-press, press, and peel as your film requires, then post-press with parchment or a Teflon sheet.
Heavy fleece is thicker than a tee, so it also changes the pressure setting. Lower the pressure knob slightly, or confirm it with a paper pull test, so the extra thickness does not overload the press. For blank recommendations, see the Gildan 18500 hoodie guide.
How to Press DTF on a Full-Zip Hoodie
Never press directly over a zipper. Plastic zipper teeth and pulls can deform under a hot platen, and metal teeth create a hard ridge that keeps the platen off the design.
The standard setup is to split the design:
- Split the artwork into a left and right half at the zipper line, leaving a small gap for the zipper. Many DTF suppliers will print both halves on one gang sheet.
- Unzip the hoodie. Place a pillow inside one side only, so the zipper hangs off the edge of the pillow.
- Press the first half, peel, and move the pillow to the other side.
- Zip the hoodie closed to check alignment before pressing the second half.
For a single left-chest logo, press on one side of the zipper with a pillow and leave the zipper outside the platen. The Jerzees 993MR full-zip hoodie guide covers a common blank for this.
How to Press DTF Near Collars, Plackets and Buttons
Polo plackets, buttons and heavy collars sit exactly where a left-chest logo goes.
- Use a small lower platen or a threadable platen so only the chest area is under the press.
- Or use a small pillow placed under the logo area, with the placket and buttons hanging off its edge.
- Button the polo before placement so the chest panel sits flat, then open the placket away from the platen if it is thick.
- For back-neck prints, keep the design below the collar seam, or use a small platen so the collar hangs free.
How to Press DTF on a Pocket Tee
A chest pocket adds a double layer and a hem along its top edge. You can print either on the pocket or above it:
- On the pocket: put a small pillow or folded cover sheet inside the pocket so the pocket face is level with its hem, and keep the design inside the pocket's edges.
- Above or beside the pocket: place a pillow under the print area that ends before the pocket, so the pocket sits below the pillow line.
How to Press DTF on Sleeves
Sleeves are narrow, and the underarm seam runs right through them.
- Slide a sleeve pillow or narrow platen inside the sleeve.
- Rotate the sleeve so the seam sits underneath, off the pillow's printing face.
- Keep the design narrower than the pillow's flat surface.
Common Mistakes
- Pressing a pillow edge under the transfer. The pillow edge prints a line just like a seam does. Use a larger pillow or move the design.
- Pressing without a pillow and adding more pressure to compensate. Extra pressure still lands on the high spot first.
- Skipping the post-press. A short finishing press with parchment or a Teflon sheet helps lock down edges near an obstacle.
- Using the same pressure for tees and hoodies. Thicker garments need the pressure knob adjusted.
Frequently Asked Questions
Can you press a DTF transfer over a seam?
You can press close to a seam, but not across it without help. A seam lifts the platen and leaves part of the design under-pressed, which shows up as a seam outline or edge lifting. Place a heat press pillow inside the garment so the print area sits above the seam, or resize the design so it stays on a flat panel.
Do you need a heat press pillow for DTF?
A pillow is not needed for a flat t-shirt front, but it is the simplest fix for hoodies, zip-ups, pocket tees, sleeves and any design near a seam. It raises the print area so pressure is even across the whole transfer, and it costs little compared with a ruined garment.
How do you put a DTF transfer on a zip-up hoodie?
Split the design at the zipper and press each half separately with a pillow inside that side of the hoodie, keeping the zipper off the pillow and out from under the platen. Zip the hoodie closed to check alignment before pressing the second half. For a left-chest logo, press on one side of the zipper only.
Why does my DTF transfer show a line through the middle?
A line through the design is almost always a seam, pocket edge, or pillow edge under the transfer. That raised edge takes the platen pressure and leaves the areas beside it under-pressed. Move the design, use a larger pillow, or switch to a smaller lower platen, then re-press with a cover sheet.
Related Guides
Tags
About the Author
DTF Database Founder
Darrin DeTorres has over 10 years of experience in the print industry, specializing in screen printing, sublimation, embroidery, HTV, and DTF printing. He runs Notice Me Marketing and Media, a custom apparel production company that prints thousands of shirts per month.
More from Tutorials
21 DTF heat press tips: check real platen temperature, test pressure, pre-press, peel for your film, post-press, and store and wash transfers right.
Explore DTF Database
Browse and compare 20+ verified DTF printer models by price, features, and specifications.
Read moreCalculate your per-print costs, profit margins, and ROI for DTF printing.
Read moreBrowse verified DTF suppliers for ink, film, powder, and equipment.
Read moreFind DTF transfer suppliers shipping to your state, with verified turnaround times.
Read moreMetro-level DTF supplier guides for Los Angeles, NYC, Dallas, Houston, and more.
Read moreStep-by-step guide to the DTF printing process with temperatures and troubleshooting.
Read more