
21 DTF Heat Press Tips for Better Adhesion and Wash Life
21 DTF heat press tips: check real platen temperature, test pressure, pre-press, peel for your film, post-press, and store and wash transfers right.
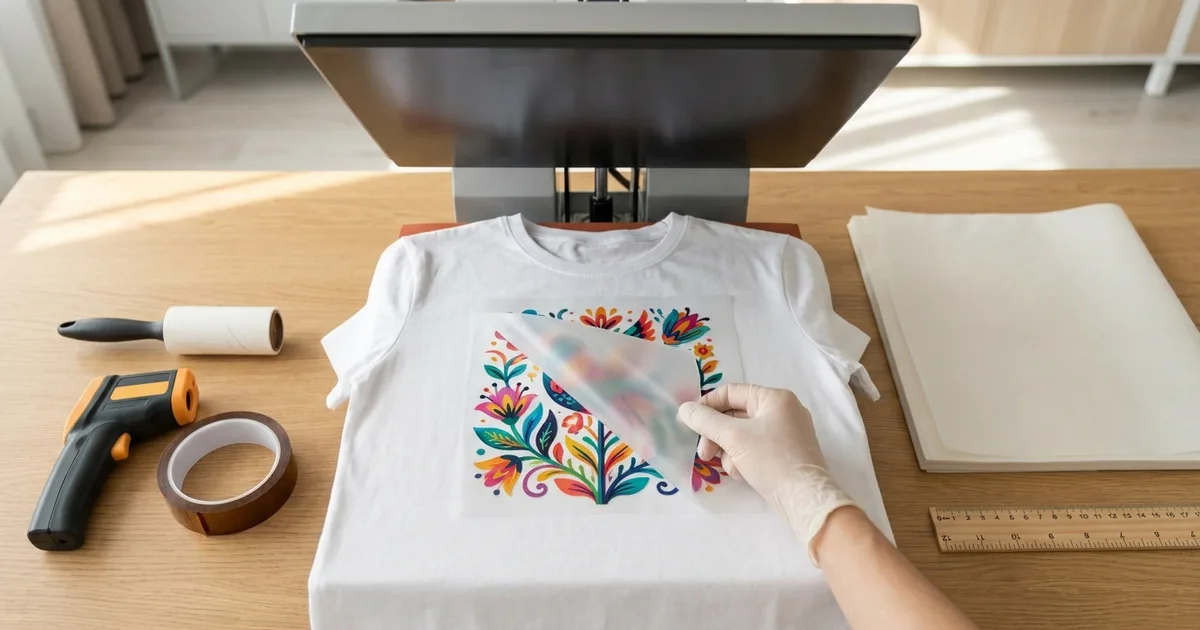
These 21 tips are grouped by stage: setting up the press, preparing the garment, pressing and peeling, and aftercare. For fabric-by-fabric temperatures and times, use the DTF temperature and time chart. This article is about the habits around those numbers.
Setting Up the Press
1. Verify the real platen temperature
A heat press readout shows the temperature at the heating element, not necessarily where the transfer meets the shirt. Check the platen surface with an infrared thermometer or heat press test strips. If the press reads cold, raise the setting to compensate.
2. Check for cold spots
Test the center and all four corners of the platen. Edges often run cooler than the middle. If one area is consistently cold, keep large designs centered or have the press serviced.
3. Let the press fully preheat
Wait a few minutes after the readout hits the target so the platen surface catches up. The first shirt of the day is the one most likely to be under-heated.
4. Test pressure with a paper pull
Close the press on a sheet of paper at each corner. If the paper slides out easily at one corner, pressure is uneven there. Most DTF films want medium-firm pressure, and the DTF heat press settings guide lists pressure by fabric.
5. Readjust pressure for thick garments
A hoodie is much thicker than a tee. If you move from tees to fleece without adjusting, the press either will not close or overloads the pressure. Reset and retest pressure each time garment thickness changes.
6. Keep the lower pad in good shape
The silicone or foam pad on the lower platen compresses over time. A worn or dented pad creates low spots with little pressure. Replace it when you see a permanent impression.
7. Keep the cover sheet clean
Parchment and Teflon sheets pick up adhesive residue that can transfer back onto a shirt. Replace parchment often and wipe Teflon sheets when cool. The heat press accessories guide compares both.
Preparing the Garment
8. Lint roll the print area
Lint and loose fibers sit between the adhesive and the fabric and weaken the bond. Roll the print area before every press, especially on dark cotton and fleece.
9. Pre-press for 2 to 5 seconds
A short pre-press drives out moisture and flattens wrinkles so the transfer makes full contact. Cotton holds humidity from the air, and that moisture weakens adhesion.
10. Keep seams and hardware off the print area
Seams, zippers, pockets and collars lift the platen off part of the design. Use a heat press pillow or a smaller lower platen. The guide to pressing DTF over seams, zippers, pockets and collars covers each setup.
11. Measure placement instead of eyeballing it
A crooked or low print is the most visible mistake a customer notices. Fold a crease down the center during the pre-press and measure down from the collar. The placement guide gives sizes and positions by garment and size.
12. Tape the transfer on hard-to-hold garments
Heat-resistant tape keeps the transfer from shifting when the press closes, which matters on slick polyester and on anything pressed with a swing-away.
13. Test new fabrics first
Coated, water-resistant, and heavily textured fabrics may not bond at standard settings. Press a test on a scrap or an inside hem before a customer run.
Pressing and Peeling
14. Use the settings for the fabric, not the shirt color
Temperature and time follow the fiber content on the tag: cotton, 50/50, CVC, polyester or tri-blend. Polyester and blends generally take lower heat than 100% cotton. Look up the fabric in the temperature and time chart.
15. Peel the way your film is designed for
Hot peel, warm peel and cold peel films are not interchangeable. Peeling a cold peel film hot can pull ink off with the film. The DTF film types guide explains the difference.
16. Peel low and slow
Peel the film back close to the garment at a low angle in one smooth motion. Fast, high peels are more likely to lift edges and fine text.
17. Re-press if any part lifts
If an edge or letter comes up with the film, lay the film back down and press again for a few more seconds before continuing the peel. The film not peeling fix covers the opposite problem.
18. Do a post-press
A short finishing press with parchment or a Teflon sheet over the bare print seats the ink and improves wash durability. Parchment tends to leave a matte finish and Teflon a slight sheen. Finishing products such as MagicSeal sheets and spray serve the same step.
19. Keep a settings log
Write down the film, garment, temperature, time, pressure and peel that worked. When a new batch of film or a new blank behaves differently, you have a baseline to compare against.
Storage and Aftercare
20. Store unpressed transfers cool, dry and flat
The adhesive powder on an unpressed transfer can absorb moisture, and moisture is the most common reason an older transfer will not stick. Keep transfers sealed, flat and out of humid rooms. The DTF shelf life guide has details.
21. Give customers wash instructions
Tell customers to wait at least 24 hours before the first wash, turn the garment inside out, wash cold, and skip bleach and fabric softener. The DTF washing and care guide has a printable version.
Frequently Asked Questions
What is the most common DTF heat press mistake?
The most common mistake is trusting the press readout. Many presses run cooler at the platen surface than the display shows, or have cold spots near the edges. Checking the real temperature with an infrared thermometer or test strips, and pairing it with firm even pressure, fixes most adhesion problems.
Should you pre-press a shirt before applying a DTF transfer?
Yes. A 2 to 5 second pre-press removes moisture and wrinkles from the garment so the adhesive makes full contact. Cotton absorbs humidity from the air, and pressing a transfer onto a damp shirt is a common cause of weak adhesion and early peeling.
Do you need to post-press DTF transfers?
A post-press is recommended for most DTF films. A short second press with parchment or a Teflon sheet over the bare print, after the film is peeled, seats the ink into the fabric and improves durability. Check your film supplier's instructions, since some films specify the finishing press time.
Why is my DTF transfer peeling off after pressing?
Peeling right after pressing usually means low platen temperature, light or uneven pressure, too little time, or peeling a film at the wrong temperature. Verify the real platen temperature, retest pressure, confirm the peel type, then re-press. The DTF transfer not sticking guide walks through each cause.
Related Guides
Tags
About the Author
DTF Database Founder
Darrin DeTorres has over 10 years of experience in the print industry, specializing in screen printing, sublimation, embroidery, HTV, and DTF printing. He runs Notice Me Marketing and Media, a custom apparel production company that prints thousands of shirts per month.
More from Tutorials
Seams, zippers, pockets and collars lift the platen off a DTF transfer. How to use press pillows, threadable platens and placement to press them evenly.
Explore DTF Database
Browse and compare 20+ verified DTF printer models by price, features, and specifications.
Read moreCalculate your per-print costs, profit margins, and ROI for DTF printing.
Read moreBrowse verified DTF suppliers for ink, film, powder, and equipment.
Read moreFind DTF transfer suppliers shipping to your state, with verified turnaround times.
Read moreMetro-level DTF supplier guides for Los Angeles, NYC, Dallas, Houston, and more.
Read moreStep-by-step guide to the DTF printing process with temperatures and troubleshooting.
Read more